I took the following steps to accomplish the task (thanks to the folks on the iPhone Dev Team, iPhone Elite Team and various other iPhone enthusiasts who shared their experience on the hackint0sh forum):
- Downloaded all required software
- iBrickr version 0.8 (http://rapidshare.com/files/55276409/iBrickr_0.8.zip) (Yes, definitely use version 0.8; I tried the automated FW downgrade option from version 0.91 and the Baseband downgrade did not ge to complete!)
- The original iPhoneUnlock package (http://rapidshare.com/files/55248680/iphoneUnlock.zip.html) that has bbupdater, etc.
- Secpack of baseband firmware 4.0 (http://tinyurl.com/2dyq25 - and rename it to secpack -- Yes, just secpack)
- ieraser from http://www.fink.org/ieraser/
- PACAY activation package (http://rapidshare.com/files/52087915/PACAY.rar.html) to activate the iPhone after it was jailbroken
- Downgraded the new firmware 1.1.1 to 1.0.2
- Download the iPhone1,1_1.0.2_1C28_Restore.ipsw from Apple.
- Connect phone to dock or directly via USB cable, I find it easier to work with the iPhone while it is connected to the USB cable, and hold down home button and power button for about 10 seconds until phone turns off (you will see the red sliding lever on top but ignore it)
- When it turns off, well, actually, appears to be off but there are horizontal lines on the screen, that's your clue to release the power button, but continue holding the home button. After about 10 seconds the computer will detect the iphone in restore mode, and iTunes should tell that the phone needs to be restored.
- Hold down SHIFT-key (I am using Windows so the SHIFT key does the trick; folks using Macintosh may need to use the OPTION/ALT key instead) when clicking the Restore button, and select the file you downloaded previously.
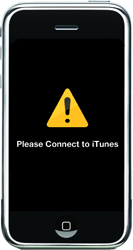
- Let the restore complete and ignore the error at the end. Now your phone should show a warning yellow triangle, but don't worry about it.
- Run AppTap to jailbreak your phone - it will fix it even though you get errors.

After the firmware was downgraded and jailbroken, I used the PACAY activation package to activate the iPhone.
Then, I used iBrickr to install the Installer to facilitate the third-party application installation into the iPhone.
After the Installer was installed, I turned on Wi-Fi and connected to my LAN. The next essential step is to install the following packages to the iPhone in this order:
1) Community Sources
2) BSD Subsystem (this step takes a few minutes to complete)
3) OpenSSH
After the packages were installed, I used iBrickr to upload the files from the iPhoneUnlock package that I downloaded earlier. The files I uploaded were: bbupdater, ICE03.14.08_G.eep, ICE03.14.08_G.fls, ieraser, secpack. They were uploaded to /usr/bin/
The next step requires the IP address of the iPhone so I can SSH into it, I made a note of the IP address of the phone from the General Wi-Fi Connection Name and the ">" option on the phone.
In order to SSH into the iPhone, I downloaded PuTTY (http://www.chiark.greenend.org.uk/~sgtatham/putty/download.html). The first time I tried to connect, the iPhone took a while to respond because it had to generate the RSA key. After PuTTY connected to the iPhone, I used the user name "root" and the password "dottie" to log in.
Once connected, I followed these steps to downgrade the baseband:
- cd /usr/bin/
- chmod +x bbupdater
- chmod +x ieraser
- launchctl remove com.apple.CommCenter (No result output)
- run "bbupdater -v" (baseband information is listed)
- run ieraser (this takes a few moments to complete, if you are looking at the line "Waiting for data" and nothing is happening you may have to start all over. This is what happened to me when I tried the automated firmware downgrading using iBrickr version 0.91!!!)
- run "bbupdater -v" (baseband information is listed, but there will be none because it was already erased from the previous step)
- run "bbupdater -e ICE03.14.08_G.eep -f ICE03.14.08_G.fls" (the output contains the information about the baseband)
- run "bbupdater -v" (3.14 baseband information is listed)
After the baseband was downgraded, I used iBrickr to install anySIM 1.02 and used it to unlock the phone.
The whole process took about 45 minutes to complete.

No comments:
Post a Comment