Tuesday, January 22, 2008

Jailbreaking iPhone with FW 1.1.2

Okay, I am tired of waiting for a software solution to unlock the new firmware (1.1.2) so let's spend some money on a xSIM (x=Turbo, x=SIMple, x=HyperCard, x=Next, etc.) to use the iPhone with a GSM SIM card other than AT&T's.

You're going to need some files first, it'd be better if you have all the files handy before you start so that you don't have to scramble for them when needed.

The following files are essential to the jailbreaking:
  1. Official 1.1.1 firmware (http://appldnld.apple.com.edgesuite.net/content.info.apple.com/iPhone/061-3883.20070927.In76t/iPhone1,1_1.1.1_3A109a_Restore.ipsw)
  2. Official 1.1.2 firmware (http://appldnld.apple.com.edgesuite.net/content.info.apple.com/iPhone/061-4037.20071107.5Bghn/iPhone1,1_1.1.2_3B48b_Restore.ipsw)
  3. iDemocracy (http://idemocracy.googlecode.com/files/iDemocracy2.rar) -- Note that your computer will need to have the up-to-date .NET framework which is also available from the iDemocracy page (http://idemocracy.googlecode.com/files/DotNetFramework3.5Final.exe)
  4. iBrickr (http://ibrickr.com/downloads/ibrickr_v0.91.zip)
  5. Java software if you don't already have it (www.sun.com)

I use iTunes 7.5 for the steps here; I have not tried 7.6 -- some of my friends say it does not work properly as far as managing the iPhone (for the hacking purposes anyway.)

After you have downloaded the necessary files, let's get started...it's not that complicated, just a little bit lengthy because of the time it takes to restore and/or update the firmware from iTunes.

  1. Connect the iPhone to the computer and run iTunes
  2. Put the iPhone into the DFU restore mode (you know the drill: hold down the power and home buttons together until the red slider appears. Keep holding the buttons until the iPhone turns off, but as soon as the iPhone turns off, let go of the power button and continue to hold the home button until iTunes recognizes the iPhone again---but displaying the message that "iTunes has detected an iPhone in Restore Mode...")
  3. Hold down the shift key while clicking the Restore button, select the firmware 1.1.1 file
  4. Let iTunes complete the restore process, it will end with an error which is expected
  5. Acknowledge the error
  6. Run iBrickr, click on the reboot link in iBrickr and wait until the iPhone is completely rebooted
  7. IMPORTANT: The next few steps require access to a Wi-Fi source and a SIM-card with PIN turned off!
  8. On the activation screen, slide for emergency and dial: *#301# to make the phone call itself. (If the incoming call dialog quickly disappears but it keeps ringing, just dial 0 (remove *#301# first), and it will call itself)
  9. Answer the call, and tap on Hold
  10. Phone will call it self again, tap Decline. You will now be returned to the normal dialer
  11. Tap on contacts, and tap the + icon to add a new. The only info you are going to add to this contact are two URL's. To add a URL, tap Add new URL. The first URL is prefs followed by a colon: prefs: and the second is jailbreakme.com. Tap Save.
  12. Your contact now has two "web pages" - tap on the first one (prefs:). This will take you to the settings dialog. The reason you want this, is because you need to connect to a Wi-Fi network, so tap on Wi-Fi, and get connected to a network, and make sure the icon on top of the screen is indicating that you are connected. While you are in the settings dialog, you should also set: General → Auto-Lock → Never
  13. Now, press the home button, and again, slide for emergency dial 0, Answer the call, Hold and Decline the new call so that you get to the contacts. Tap on your contact (No Name), and this time tap on the other home page, jailbreakme.com Safari will launch and show you a webpage. Read through the text, before you Install AppSnapp Phone will return to activation screen, but don't panic, just wait...
  14. Phone should automaticly restart after almost a minute. (If for some reason the phone does not restart, repeat step #13 again. It may take a few tries, depending on the internet traffic)
  15. When the phone starts again, it should no longer say slide for emergency, but rather Slide to unlock It means it was successfull! Activation is now bypassed, and phone prepared for software installation!
  16. Now that the iPhone is fully activated, run the Installer to install the necessary file that would allow the new firmware to be jailbroken again. You can find the file in the Tweaks 1.1.1 section, look for Oktoprep and install it
  17. After you have installed Oktoprep, click on the Home button to complete the installation
  18. iTunes should still have the iPhone listed under the Devices section, select it to display the Summary page, hold down the shift key and click on the Update button --- Yes, UPDATE and not RESTORE!!! Because if you click Restore, iTunes will wipe out the Oktoprep file that you installed earlier and we're back at square one (duh!)
  19. Let iTunes complete the update
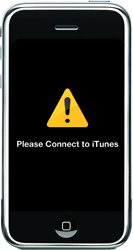
  20. After iTunes has completed the update, the phone is back at the cable and iTunes image
  21. Shut down iTunes
  22. Run iDemocracy (You did remember to download and install it, didn't you???)
  23. Click on Jailbreak
  24. Click on 1.1.2 Jailbreak
  25. Let the 1.1.2 jailbreak application complete the process
  26. Reboot the phone --- which will reboot itself before everything is done
  27. Prepare the SIM card that you are going to use by cutting the corner so that the chip is recessed and fit into the iPhone SIM tray evenly
  28. Insert the prepared SIM card and voila!

Friday, November 30, 2007

Still No News on the New Bootloader Hack

There is still no new development on the hacking of the new bootloader (version 4.6). George Hotz (aka geohot) had posted his findings of the core code. While the analysis does not give any insight as when an actual exploit will be feasible, it does outline what Apple (and its vendor) had done to tighten up the security.

There are some attempts to unlock the iPhones via hardware hackery, albeit successful, it's not for the average person to open the phone up to short out the testpoints and perform the unlock via command lines.

And the wait continues...

Sunday, November 18, 2007

New Firmware 1.1.2

The fun of unlocking iPhones is being put on hold (again) as Apple has released the new Firmware, version 1.1.2, along with the new bootloader, version 4.6.

Right now, there is no work-around to hack the new bootloader. The previous bootloader had a bug that allowed any crypto key (the key that is used to decrypt/unscramble the password) to be used as a valid key hence the iPhone Dev Team and the other teams were able to create the unlock app. As of the release of the new bootloader, Infineon, the maker of the bootloader for mobile phones (Motorola, Nokia and Sony Ericsson are among its customers) had beefed up the security therefore it's "airtight" for now. Also, in the previous releases, Apple included the bootloader core in its update package; it is intentionally left out in the new one, which makes it even harder to grab a copy of the bootloader to examine its working code.

A friend of mine bought 2 new iPhones from a local AT&T store on Saturday and both have the new bootloader. I have been reading and researching everywhere and not a clue as to when any team will release a new unlocking method. There is a Wiki that mentions a propsed date of December 1st, 2007 (http://iphone.fiveforty.net/wiki/index.php/Talk:Main_Page).

Meanwhile, I was able to resurrect a previously unlocked iPhone that was re-locked due to an update to the new Firmware 1.1.2. The process was not at all complicated. It involved downgrading to Firmware 1.0.2 first, then wiping out the new baseband and "virginizing" the empty baseband to be the original Firmware 1.0.2. Then, updating it to Firmware 1.1.1 and unlocking it again.

Saturday, November 3, 2007

Even Quicker iPhone (with FW 1.1.1) Unlock

This method only works with a brand new iPhone with firmware version 1.1.1 (for now).

Definite requirement: A reliable WiFi Connection!

I used the follow steps and got a brand new iPhone unlocked in about 12 minutes!

  1. In the Activate Iphone Screen Scroll so you can get to the dialer pad
  2. Type: *#307# and press call
  3. You Phone will Ring Answer it (If you don't get the Answer screen, Delete *#307#, type 0 (zero) and press call again)
  4. Press hold
  5. Your phone will ring again but this time decline the call, this will send you to the Contacts Screen
  6. Add a new contact:
    • Click on the First Last box, enter a name, then click Save
    • Click on the Add new URL box, add "prefs://1F", then click Save
    • Click on the Add another URL box, add "http://jailbreakme.com/", then click Save
    • Click Save to save new contact
    This will show you the new contact with the 2 new URLs
  7. Tap "prefs://1F" (this will send u to the Settings screen)
  8. Select Your WiFi Connection and leave your phone there for 1 minute or 2 to ensure that you indeed are connected to the Wi-Fi network (the Wi-Fi symbol shows up). To verify that you have obtained a legitimate IP address, click on the right arrow of the network name. You should see 192.168.x.x -- because you are connected to a LAN. If you see any other IP address, you may need to abandon the network and try to connect again.
  9. While you are at the Settings screen, click on General to set the Auto Lock time to "Never"
  10. Press the Home button to take you back to the Activation screen, dial 0 (zero) and press the call button to bring up the Answer screen, click Answer.
  11. Click Hold and the phone will ring again, click on Decline, and the contact Screen is displayed again
  12. Tap your contact, and select the URL2 http://jailbreakme.com/
  13. Scroll down, and hit "Install AppSnapp". After a few seconds, Safari should disappear, and pop you back to the Home screen --- you should see the "Slide for Emergency" prompt
  14. Wait patiently for a minute or longer--don't touch anything until the phone restarts and pops you back to the Slide to Unlock screen
  15. Slide to unlock, and Installer.app will be installed on your iPhone
  16. Once jailbroken and activated, you can run installer updated it-in Sources tap click Edit then add http://i.unlock.no/
  17. Refresh sources
  18. Install BSD Subsystem (this takes a few minutes to complete!!!)
  19. Under Unlocking Tools folder, install YouTube Activation
  20. Under Unlocking Tools folder, install AnySIM
  21. Restart Phone, check youtube
  22. Run AnySIM (does not matter which SIM card is in the phone, however, to be safe, I always use the non-AT&T SIM card)
  23. After AnySIM completes its task (Successfully, hopefully), restart iPhone and Uninstall AnySIM

Sunday, October 21, 2007

Additional Languages on iPhone

I just found a way to add more languages to the iPhone: http://code.google.com/p/iphone-language/

...I'll post the result soon after I have more time to play with it.


>>>(Saturday, November 3rd, 2007: Sometimes things aren't just as obvious as you read them. I'd been reading the instructions from the site above, and other sites, they all say, use Safari to browse to http://glassicstyle.com/iphone/ to install the iLanguage (aka Language Chooser). But I always get the error, "Safari can't open this file". Then, out of curiosity and desperation, I enter the URL in the installer's sources, and, voila! I can now install the iLanguage on my phone.


And yes, I can now display Vietnamese on my phone, too.

Thursday, October 18, 2007

Easier iPhone with FW 1.1.1 Unlocking

NEEDED:

STEP 1 - DOWNGRADE V 1.1.1 to V 1.0.2
a. Run iTunes
b. Run iBrickr
c. You will get a message from iBrickr saying: "Looks like you're running iPhone firmware 1.1.1. ....."
d. CLICK on "See how deep the rabbit hole goes" (Gotta love Nate!)
e. Your iPhone screen will turn white
f. In iTunes, press SHIFT and click on RESTORE
g. Select the file that iBrickr just downloaded called 1.02 IPSW and click OPEN... Let iTunes do the downgrade (it takes about 5 minutes)Most likely you will get error 1013 at the end... just ignore and go back to iBrickr
h. Select "I have a yellow triangle, blah blah blah" and then click on "fix it" -- at the end your phone should be back at the Activate iPhone screen
i. Close iBrickr

STEP 2 - ACTIVATE & JAILBREAK 1.0.2 (I prefer to do this with wiNstaller since it's quicker and always works!)
a. Run wiNstallerGUI.exe (Make sure iTunes is running)
b. Click on "Activate" (Should take about 30 seconds)
Now your iPhone should be activated and jailbroken!

STEP 3 - Install ANYSIM 1.1 and then unlock

a. On your iPhone, go to Settings --> General --> Auto-Lock and set to "Never"
b. Press "Home" button to exit settings menu
c. Run iBrickr and click on Applications
d. Click on "Install PXL" and follow directions (make sure you restart the iphone twice as directed"
e. Click on "Check for PXL"
f. Click on "Browse Applications"
g. Select anySIM V1.1*** If your iphone does not "soft reset" and then display the anySIM icon on the menu, just turn it off and then back on and repeat steps f. & g. ***

Use this method to get anySIM 1.1 if the repository that iBrickr uses does not have it (for some reason, it has been available off and on, the current available version is 1.0.2)


  1. Open installer and update to Installer 3

  2. Restart Installer 3

  3. Click on "Sources"

  4. Edit (top right)

  5. Add (left)

  6. Type: http://iphone.blurgle.ca/repo

  7. Enter

  8. It will install the AnySim option

  9. Refresh sources

  10. Go back to "Install" and look under "System" to find and install AnySim 1.1

  11. After you use AnySim to unlock, uninstall both anysim and the new source


h. On your iPhone, tap on the anySIM icon
i. Disregard warning (you can also run it with the original AT&T sim" -> Slide bar -> Scroll down and tap on "OK, Unlock My Phone" (should take 3-5 minutes)
*** You should get the message saying "Your iphone has been successfully unlocked" ***YOU ARE DONE!!!

STEP 4 -Install lockdown file (Optional but I recommend it)
a. In iBrickr, go back to the main menu and select "Files"
b. On iPhone picture on the right, navigate to usr/ libexec/
c. Click on "Upload Files" and select the lockdown file you downloaded. Restart iPhone

STEP 5 - YOUTUBE activation
a. Open PACAY's folder
b. Click on "Click here - activate.bat
c. Let it finish and restart iPhone

STEP 6 - Remove the anySIM icon (Advisable if you ever have to claim warranty on your iPhone)
a. Run iBrickr
b. Click on "Applications"
c. Click on red dot on iphone pic next to anySIM
d. Restart iPhoneFINISH

Special thanks to "woomwireless" on hackint0sh forum.

Sunday, October 14, 2007

Out-of-the-Box 1.1.1 Unlocking

I unlocked an out-of-the-box iPhone having firmware 1.1.1 today. It took longer than the typical FW 1.0.2 unlocking process but certainly feasible.

I took the following steps to accomplish the task (thanks to the folks on the iPhone Dev Team, iPhone Elite Team and various other iPhone enthusiasts who shared their experience on the hackint0sh forum):


  1. Downloaded all required software


  2. Downgraded the new firmware 1.1.1 to 1.0.2

    • Download the iPhone1,1_1.0.2_1C28_Restore.ipsw from Apple.

    • Connect phone to dock or directly via USB cable, I find it easier to work with the iPhone while it is connected to the USB cable, and hold down home button and power button for about 10 seconds until phone turns off (you will see the red sliding lever on top but ignore it)

    • When it turns off, well, actually, appears to be off but there are horizontal lines on the screen, that's your clue to release the power button, but continue holding the home button. After about 10 seconds the computer will detect the iphone in restore mode, and iTunes should tell that the phone needs to be restored.

    • Hold down SHIFT-key (I am using Windows so the SHIFT key does the trick; folks using Macintosh may need to use the OPTION/ALT key instead) when clicking the Restore button, and select the file you downloaded previously.

    • Let the restore complete and ignore the error at the end. Now your phone should show a warning yellow triangle, but don't worry about it.

    • Run AppTap to jailbreak your phone - it will fix it even though you get errors.


After the firmware was downgraded and jailbroken, I used the PACAY activation package to activate the iPhone.

Then, I used iBrickr to install the Installer to facilitate the third-party application installation into the iPhone.

After the Installer was installed, I turned on Wi-Fi and connected to my LAN. The next essential step is to install the following packages to the iPhone in this order:
1) Community Sources
2) BSD Subsystem (this step takes a few minutes to complete)
3) OpenSSH

After the packages were installed, I used iBrickr to upload the files from the iPhoneUnlock package that I downloaded earlier. The files I uploaded were: bbupdater, ICE03.14.08_G.eep, ICE03.14.08_G.fls, ieraser, secpack. They were uploaded to /usr/bin/

The next step requires the IP address of the iPhone so I can SSH into it, I made a note of the IP address of the phone from the General Wi-Fi Connection Name and the ">" option on the phone.

In order to SSH into the iPhone, I downloaded PuTTY (http://www.chiark.greenend.org.uk/~sgtatham/putty/download.html). The first time I tried to connect, the iPhone took a while to respond because it had to generate the RSA key. After PuTTY connected to the iPhone, I used the user name "root" and the password "dottie" to log in.

Once connected, I followed these steps to downgrade the baseband:

  1. cd /usr/bin/
  2. chmod +x bbupdater
  3. chmod +x ieraser
  4. launchctl remove com.apple.CommCenter (No result output)
  5. run "bbupdater -v" (baseband information is listed)
  6. run ieraser (this takes a few moments to complete, if you are looking at the line "Waiting for data" and nothing is happening you may have to start all over. This is what happened to me when I tried the automated firmware downgrading using iBrickr version 0.91!!!)
  7. run "bbupdater -v" (baseband information is listed, but there will be none because it was already erased from the previous step)
  8. run "bbupdater -e ICE03.14.08_G.eep -f ICE03.14.08_G.fls" (the output contains the information about the baseband)
  9. run "bbupdater -v" (3.14 baseband information is listed)

After the baseband was downgraded, I used iBrickr to install anySIM 1.02 and used it to unlock the phone.

The whole process took about 45 minutes to complete.